Decks
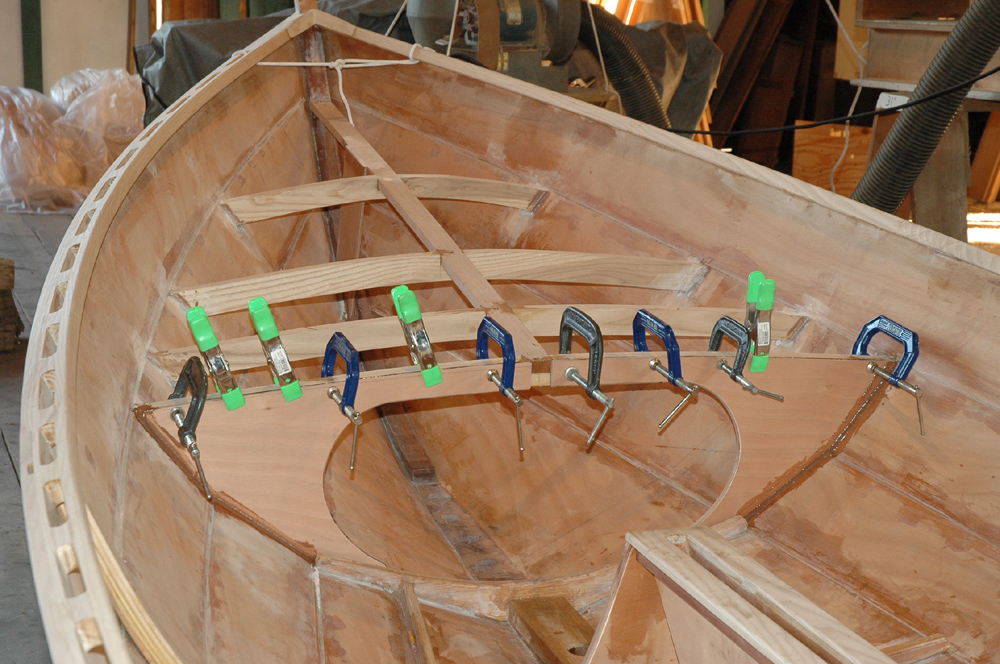
There are three options when it comes to decking the Ness Yawl: 1. flat decks, 2. crowned decks, 3 crowned decks with curved coamings. I, of course, chose option 3, which is much more complex than options 1 or 2. The photo above shows the forward decks structure, four cross beams and a king beam. There is also a gusset (not very visible in this photo) that extends from the king beam, forward of the first cross beam, down to the stem. The forestay will be attached to a padeye that is bolted to the deck at this point and the gusset transmits the pull of the forestay down to the backbone of the boat.
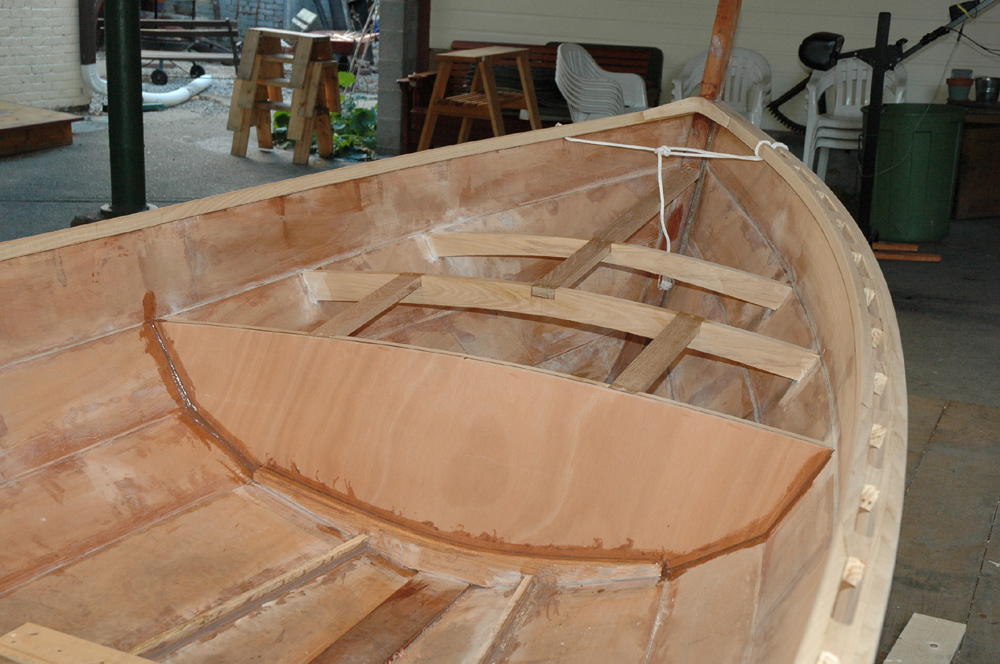
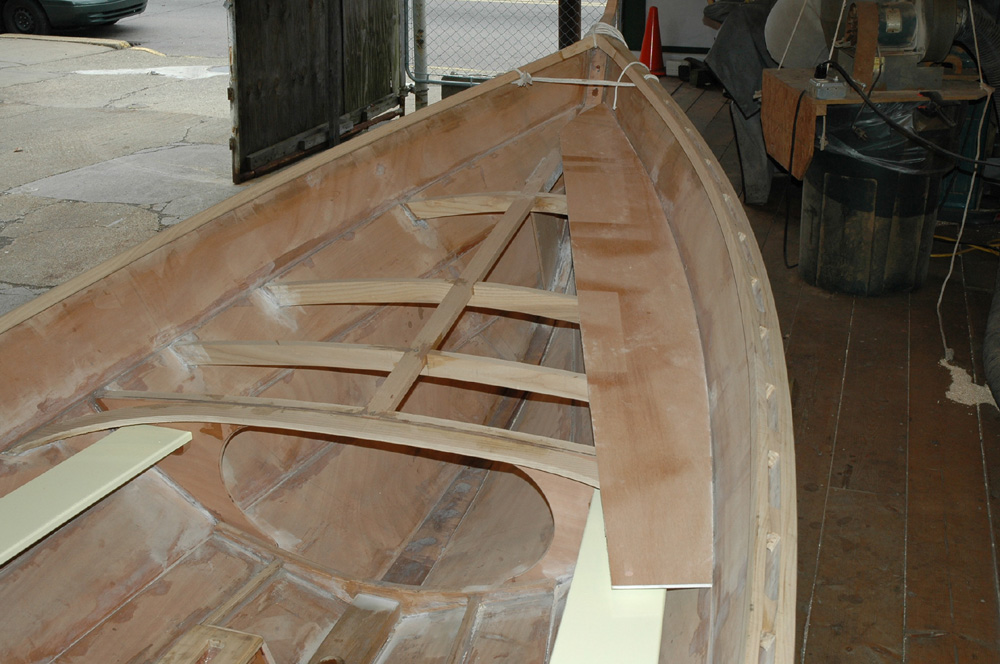
I decided not to install a full bulkhead so we would have more storage. Instead I made these large knees (or it's a bulkhead with a really big cutout, if you would prefer).
I have made the curved beams that define the shape of the coaming, but winter came and I haven't been able to install them yet. Also, I still have to make bending forms and laminate the coamings, which will be clear finished ash like most of the rest of the trim.
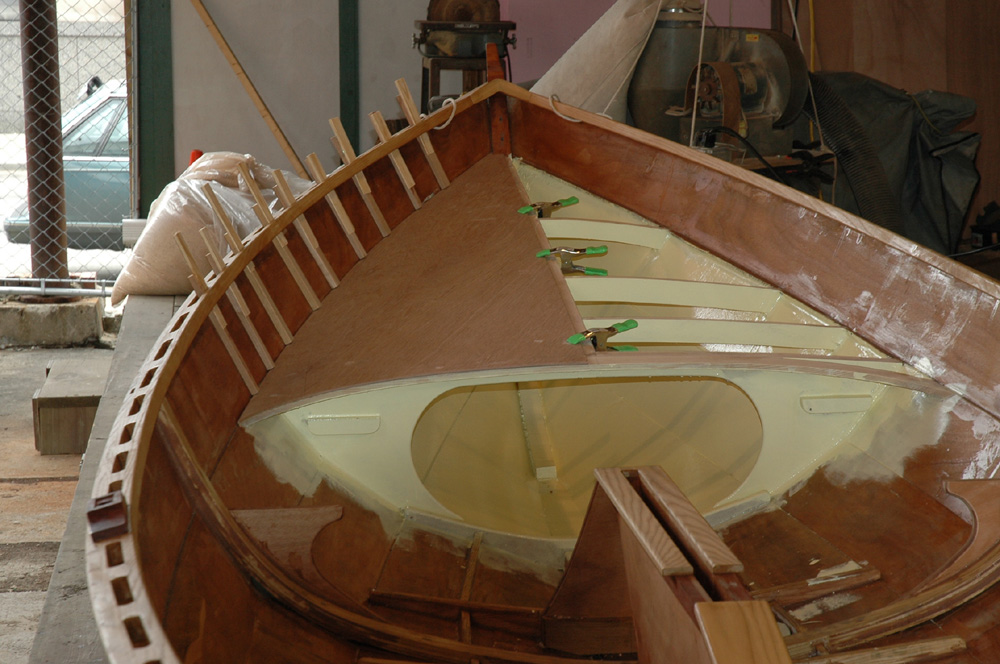
Here's a shot of the stern deck structure. This also differs from the plans. I installed a full bulkhead (with no hatches). Instead, there will be a large hatch in the deck, and I modified the beams for that purpose. The hatch will be big enough for a good sized cooler (lunch, the most important marine accessory!) or a marine battery. If Goldberry ever gets a motor, it will probably be a small trolling motor. The hatch cover will be water tight and held down with shock cord, so the space will serve for flotation. We will use floation bags up forward and/or under the side benches.
Poof - several weeks have gone by and the weather is finally warm enough to epoxy outside! Here's how I went about putting on the decks. I'll show photos just of the foredeck - the after deck was just the same.
Iain Oughtred's method for attaching the deck along the hull is with a thick epoxy fillet. To make the fillet I needed a pattern that follows the curve of the hull. I made it from 1/8" luan and coated the underside with clear packing tape so it wouldn't become a permanent part of the boat. I clamped it in place and, pretty much standing on my head, made a fillet with VERY thick epoxy. Once the epoxy set up, I had a perfectly fair ledger to which I could attach the hull! It worked really well and saved making wood parts with complex rolling bevels.
This is the pattern for the deck halfm along made from thin luan. The open gunwales were really useful here - sticks and shims made great (and free) clamps. Oh, and as you can obviously see, I painted the area under the deck now!
Click here to continue the deck story.